Interactive Jobs#
Interactive jobs allow a user to interact with applications in real-time within an HPC environment. With interactive jobs, users request time and resources to work on a compute node directly. Users can then run graphical user interface (GUI) applications, execute scripts, or run other commands directly on a compute node. Common reasons for running interactive jobs include debugging, designing workflows, or preference in using the GUI interface of an application.
General Interactive Jobs#
To run an interactive job on Research Computing resources, request an interactive session by utilizing the sinteractive command. The sinteractive command creates a job with parameters provided through flags passed with the command. After moving through the Slurm queue the interactive job will put the user onto the command line of a compute node to interactively use their resource allotment. Any resource that could be specified in a job script or with sbatch can also be used with sinteractive.
The primary flags we recommend users specify are the partition flag and the time flag. These flags will specify partition and amount of time for your job respectively. The sinteractive command is run as follows:
sinteractive --partition=amilan --time=00:10:00 --ntasks=1 --nodes=1 --qos=normal
This will run an interactive job to the Slurm queue that will start a terminal session that will run on one core of one node on the amilan partition for ten minutes. Once the session has started you can run any application or script you may need from the command line. For example, if you load the Python module using module load python and then type python, you will open an interactive python shell on a compute node (rather than the login nodes, which is forbidden). When you are finished with your interactive job, you can end the session by typing exit. If you do not end your session, the interactive job will run for the full time requested, which will use up part of your allocation.
See also
Check out this page for a list of Slurm directives that can be used with interactive jobs.
Interactive GUI Applications#
To run an interactive GUI application on HPC Systems, we must install an X windows server application and enable X11 forwarding on our personal computer.
Windows setup#
On Windows, we must first install an X windows server application to allow the cluster to forward the GUI information to your local system. For Windows, we will use an application called Xming to accomplish this. Download Xming here.
Download and install the PuTTY application here if you have not done so already.

Expand the SSH tab on the left side of the application and click X11.

In the X11 Menu check the “Enable X11 Forwarding” checkbox and type “localhost:0” in the X display location field. Clicking “Open” will open a terminal window where you can login.
See also
This tutorial assumes that you are already set up with OpenSSH for Windows. Here is a guide for setting up OpenSSH for Windows. Note that OpenSSH Server does not have to be running for you to proceed.
You can deploy Xming by running the Xlaunch application (or opening the Xlaunch shortcut on your desktop). When prompted to select display settings, select ‘Multiple windows’ and set the Display number to 0. From there, use the default selections until Xlaunch is finished.
Next, you’ll need to set your display value. Open the Command Prompt (or Powershell) and set the $DISPLAY variable as follows:
Command Prompt:
cd C:\
set DISPLAY=127.0.0.1:0.0
Powershell:
cd C:\
$env:DISPLAY="127.0.0.1:0.0"
Now, you’ll need to make a modification to your local ssh config file or create one if it doesn’t already exist. By default, this file is located at C:/Users/<username>/.ssh/config. Edit this file and add the following lines:
Host *
    ForwardAgent yes
    ForwardX11 yes
    ForwardX11Trusted yes
Lastly, you can ssh to login.rc.colorado.edu as you normally would, except you’ll include the -X flag:
ssh -X your_rc-username@login.rc.colorado.edu
macOS setup#
Using macOS, we will also need to install an X windows server application to allow the cluster to forward GUI information to your local system. For Mac, we will use an application called XQuartz to accomplish this. Download and install XQuartz here.
Opening the application will bring up a terminal window. In this window, you will ssh to login.rc.colorado.edu as you normally would except you’ll include the -X flag:
ssh -X your_rc-username@login.rc.colorado.edu
Running GUI Applications#
Once you have logged into the system with X11 Forwarding enabled, you will be able to initialize a GUI application by starting an interactive job and running your selected application. The X-window server application installed on your local system will display the window generated on the cluster on your local machine.
If you plan on running interactive job from a compile node, you must also enable x11 forwarding when you request a node using acompile:
acompile -X
From here, you will be able to run your interactive job like normal and X11 forwarding will carry through to the job.
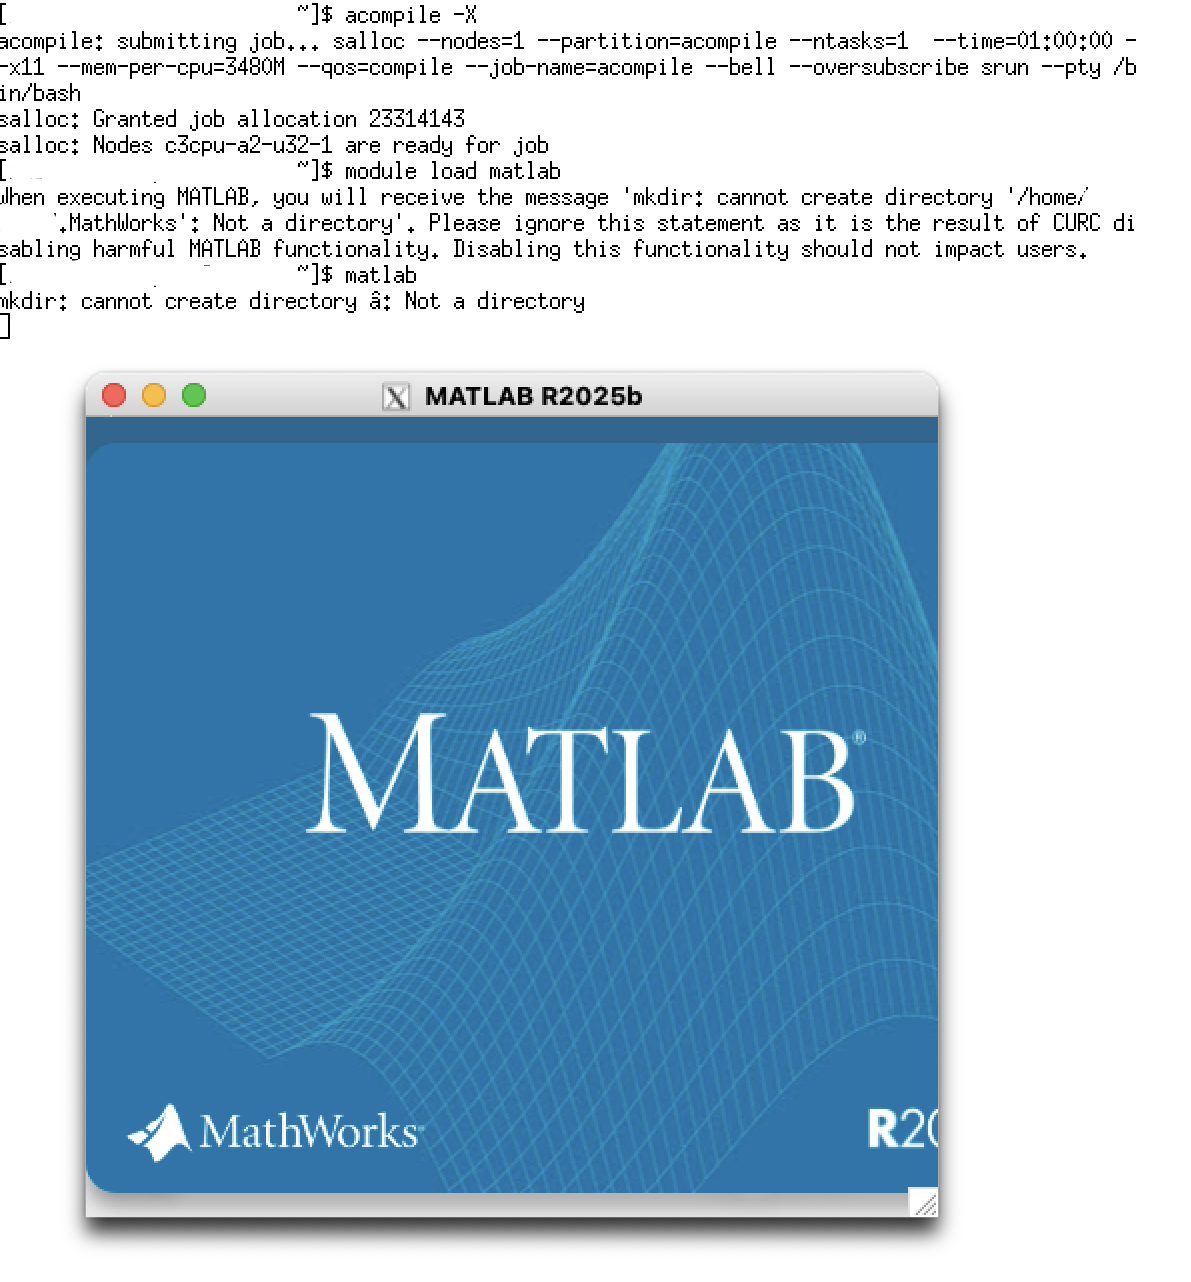
Once your interactive session has started, you can launch GUI-based applications such as MATLAB. For example:
module load matlab
matlab
This will start MATLAB on the allocated compute node and display the interface on your local machine via X11 forwarding. The MATLAB window should appear shortly after the command is executed. See the example image below for reference.