
Accessing the AWS CLI#
AWS CLI temporary credentials are valid for 4 hours and can be established through any of the methods outlined below.
Note: The $ in the examples below indicates your prompt. Do not type it as input.
Prerequisites#
The AWS CLI tools is installed. Please refer to the AWS CLI installation documentation for instructions.
If you are a member of another CU campus:
CU Anschutz users: To get your account synced to the Boulder Entra tenant, send a ticket to the CU Anschutz OIT Service Desk and request access to Boulder’s AWS instance. As part of this process, you’ll need to set up Microsoft MFA, so have your mobile phone number ready.
CU System (UIS) users: To access campus cloud content/resources such as AWS, Microsoft 365 (Teams, SharePoint, Azure), please email help@cu.edu and provide the following:
Which campus do you need access to?
Which resources are you trying to access?
Indicate your justification for access to these resources.
The Microsoft authenticator App (MFA) app is installed and enrolled. Visit OIT’s Microsoft 365 Multi-Factor Authentication documentation to install and enroll MFA.
Option 1: Environment variables from the web browser#
This option is recommended when you have a quick task to do from a single shell.
Log in to the AWS Management Console (SSO URL) using steps 1-4 from Single Sign-On.
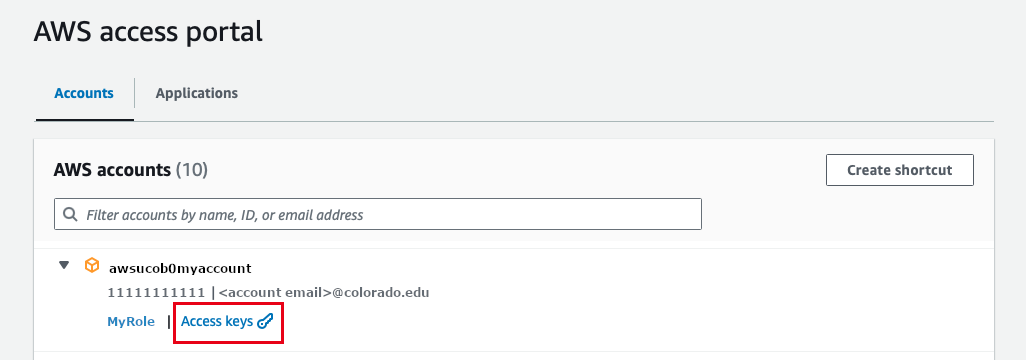
You will be presented with a list of account names and numbers to which you have access. Click on the name of the desired account to expand the roles allocated to you. Click on “Access Keys” next to the name of the desired role.
You will be presented with multiple options for acquiring access keys for the CLI. Click on the tab that matches your operating system (OS).
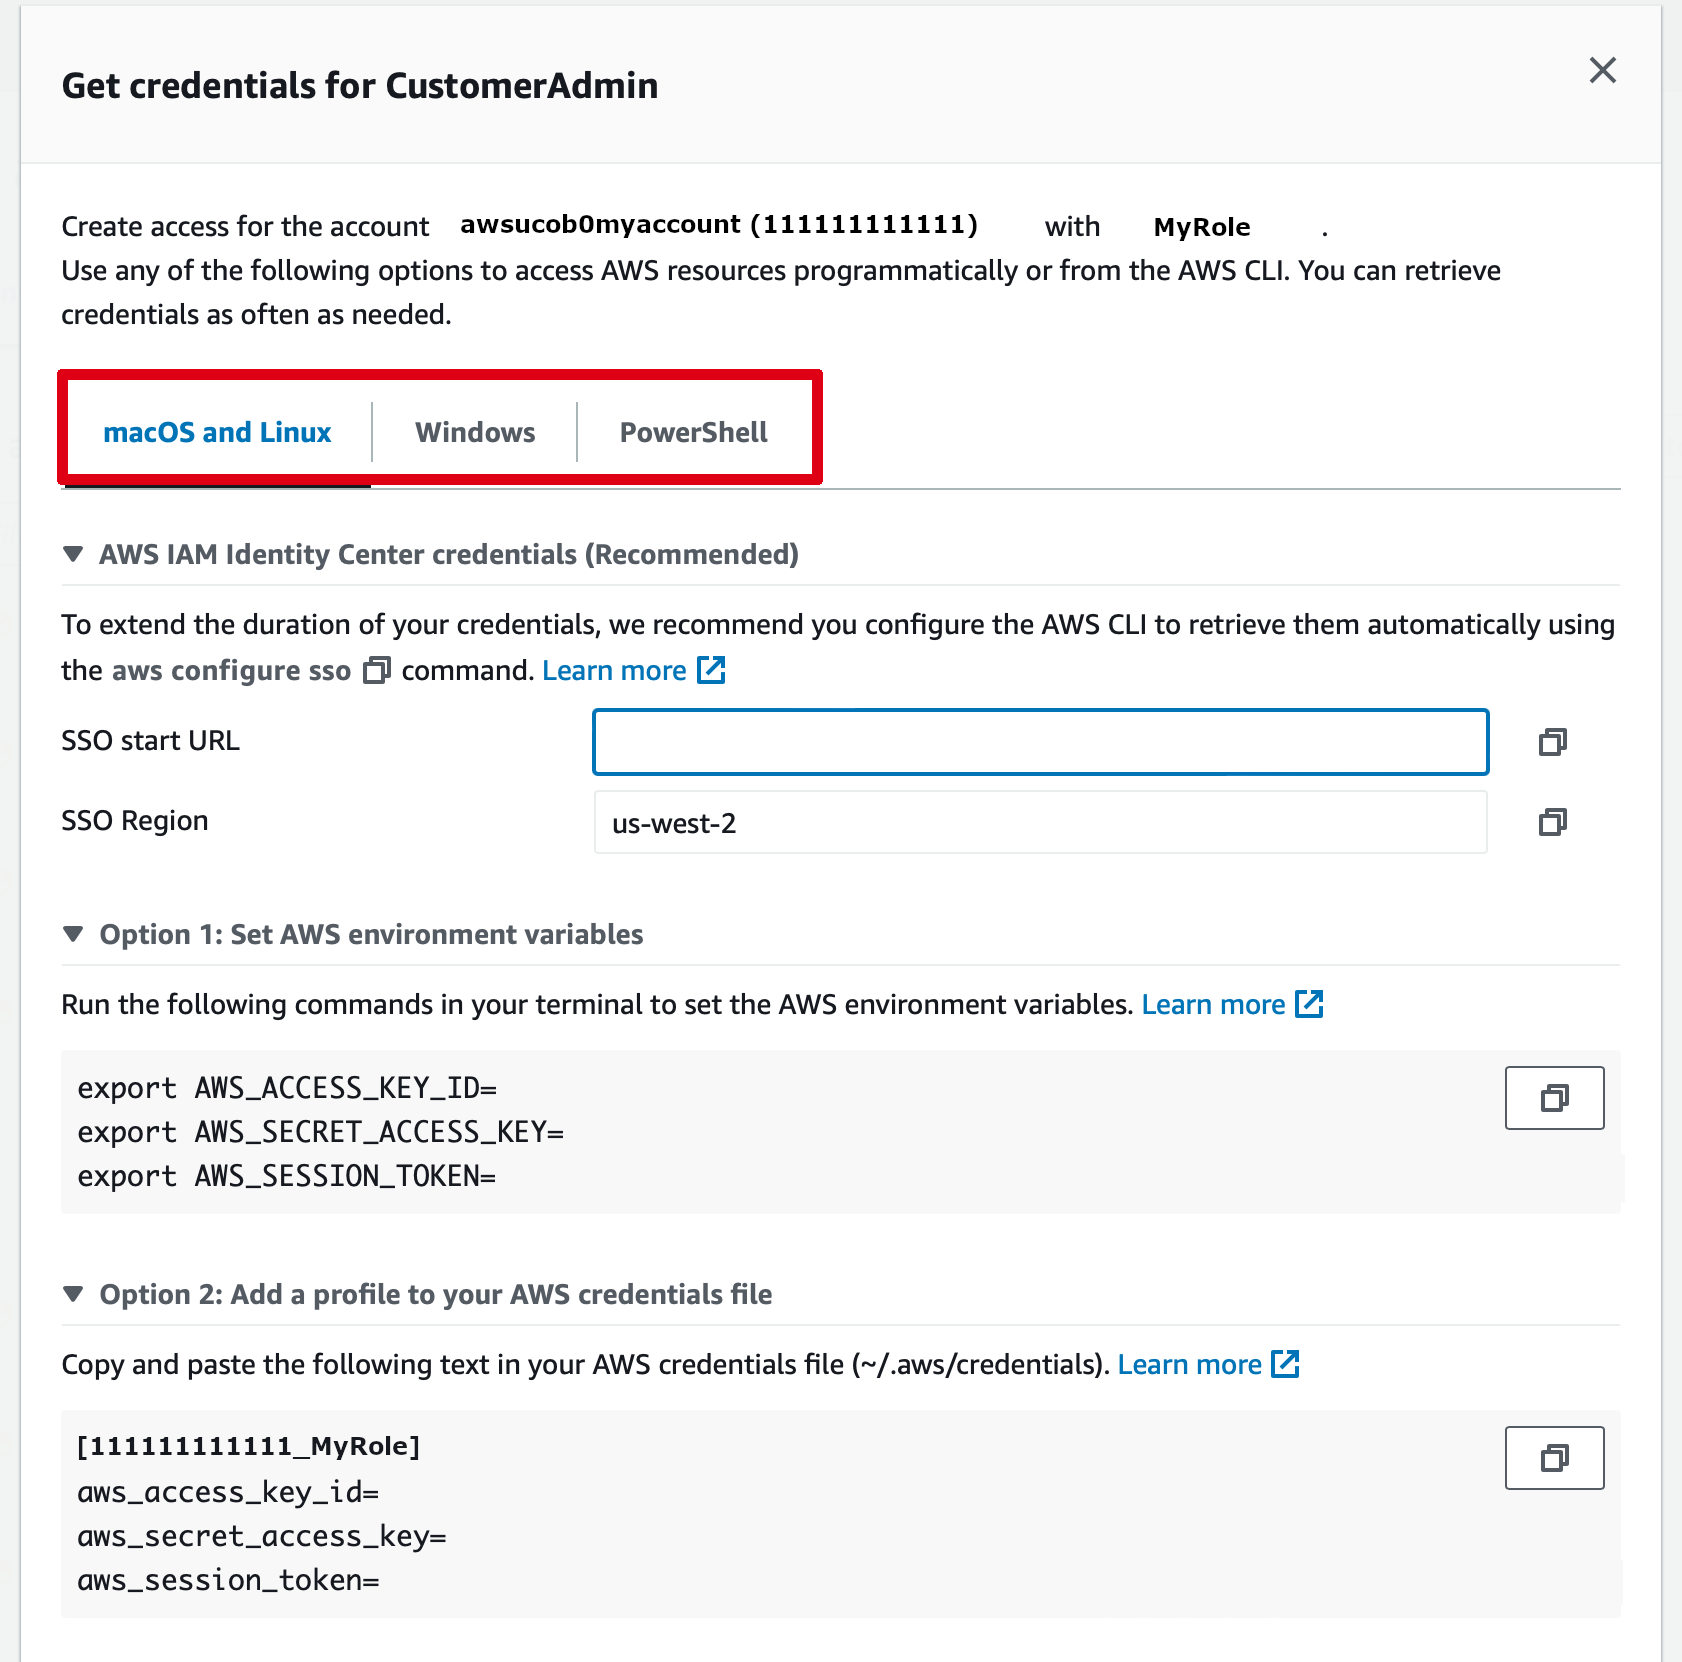
Expand the section named “Option 1: Set AWS environment variables” and click on the overlapping squares icon to copy the environment variable commands that contain your credentials. The exact commands displayed will vary by OS and shell.

In a terminal on your local machine, paste in the environment variable commands that you just copied and hit Enter. If you require authentication in multiple shell sessions, you’ll need to paste the same keys in each one.
$ export AWS_ACCESS_KEY_ID="AAAAAAAAAAAAAAAAAAAA"
export AWS_SECRET_ACCESS_KEY="AAAAAAAAAAAAAAAAAAAAAAAAAAAAAAAAAAAAAAAA"
export AWS_SESSION_TOKEN="AAAAAAAAAAAAAAAAAAAAAAAAAAAAAAAAAAAAAAAAAAAAAAAAAAAAAAAAAAAAAAAAAAAAAAAAAAAAAAAAAAAAAAAAAAAAAAAAAAAAAAAAAAAAAAAAAAAAAAAAAAAAAAAAAAAAAAAAAAAAAAAAAAAAAAAAAAAAAAAAAAAAAAAAAAAAAAAAAAAAAAAAAAAAAAAAAAAAAAAAAAAAAAAAAAAAAAAAAAAAAAAAAAAAAAAAAAAAAAAAAAAAAAAAAAAAAAAAAAAAAAAAAAAAAAAAAAAAAAAAAAAAAAAAAAAAAAAAAAAAAAAAAAAAAAAAAAAAAAAAAAAAAAAAAAAAAAAAAAAAAAAAAAAAAAAAAAAAAAAAAAAAAAAAAAAAAAAAAAAAAAAAAAAAAAAAAAAAAAAAAAAAAAAAAAAAAAAAAAAAAAAAAAAAAAAAAAAAAAAAAAAAAAAAAAAAAAAAAAAAAAAAAAAAAAAAAAAAAAAAAAAAAAAAAAAAAAAAAAAAAAAAAAAAAAAAAAAAAAAAAAAAAAAAAAAAAAAAAAAAAAAAAAAAAAAAAAAAAAAAAAAAAAAAAAAAAAAAAAAAAAAAAAAAAAAAAAAAAAAAAAAAAAAAAAAAAAAAAAAAAAAAAAAAAAAAAAAAAAAAAAAAAAAAAAAAAAAAAAAAAAAAAAAAAAAAAAAAAAAAAAAAAAAAAAAAAAAAAAAAAAAAAAAAAAAAAAAAAAAAAAAAAAAAAAAAAAAAAAAAAAAAAAAAAAAAAAAAAAAAAAAAAAAAAAAAAAAAAAAAAAAAAAAAAAAAAAAAAAAAAAAAAAAAAAAAAAAAAAAAAAAAAAAAAAAAAAAAAAAAAAAAAAAAAAAAAAAAAAAAAAAAAAAAAAAAAAAAAAAAAAAAAAAAAAAAAAAAAAAAAAAAAAAAAAAA"
$
Your session in the window where you pasted the credentials (only) is now authorized for AWS from the CLI. Confirm your access by querying your AWS identity.
$ aws --no-cli-pager sts get-caller-identity
{
    "UserId": "AAAAAAAAAAAAAAAAAAAAA:ralphie@colorado.edu",
    "Account": "111111111111",
    "Arn": "arn:aws:sts::111111111111:assumed-role/AWSReservedSSO_MyRole_aaaaaaaaaaaaaaaa/ralphie@colorado.edu"
}
You can now use AWS CLI commands and libraries that auto-detect credentials (like boto3) in this shell session. To log out, just exit the shell session.
Option 2: Configuration file from the web browser#
This option is recommended when you want to use multiple shell sessions to access a single AWS account.
Log in to the AWS Management Console (SSO URL) using steps 1-4 from Single Sign-On.
You will be presented with a list of account names and numbers to which you have access. Click on the name of the desired account to expand the roles allocated to you. Click on “Access Keys” next to the name of the desired role.
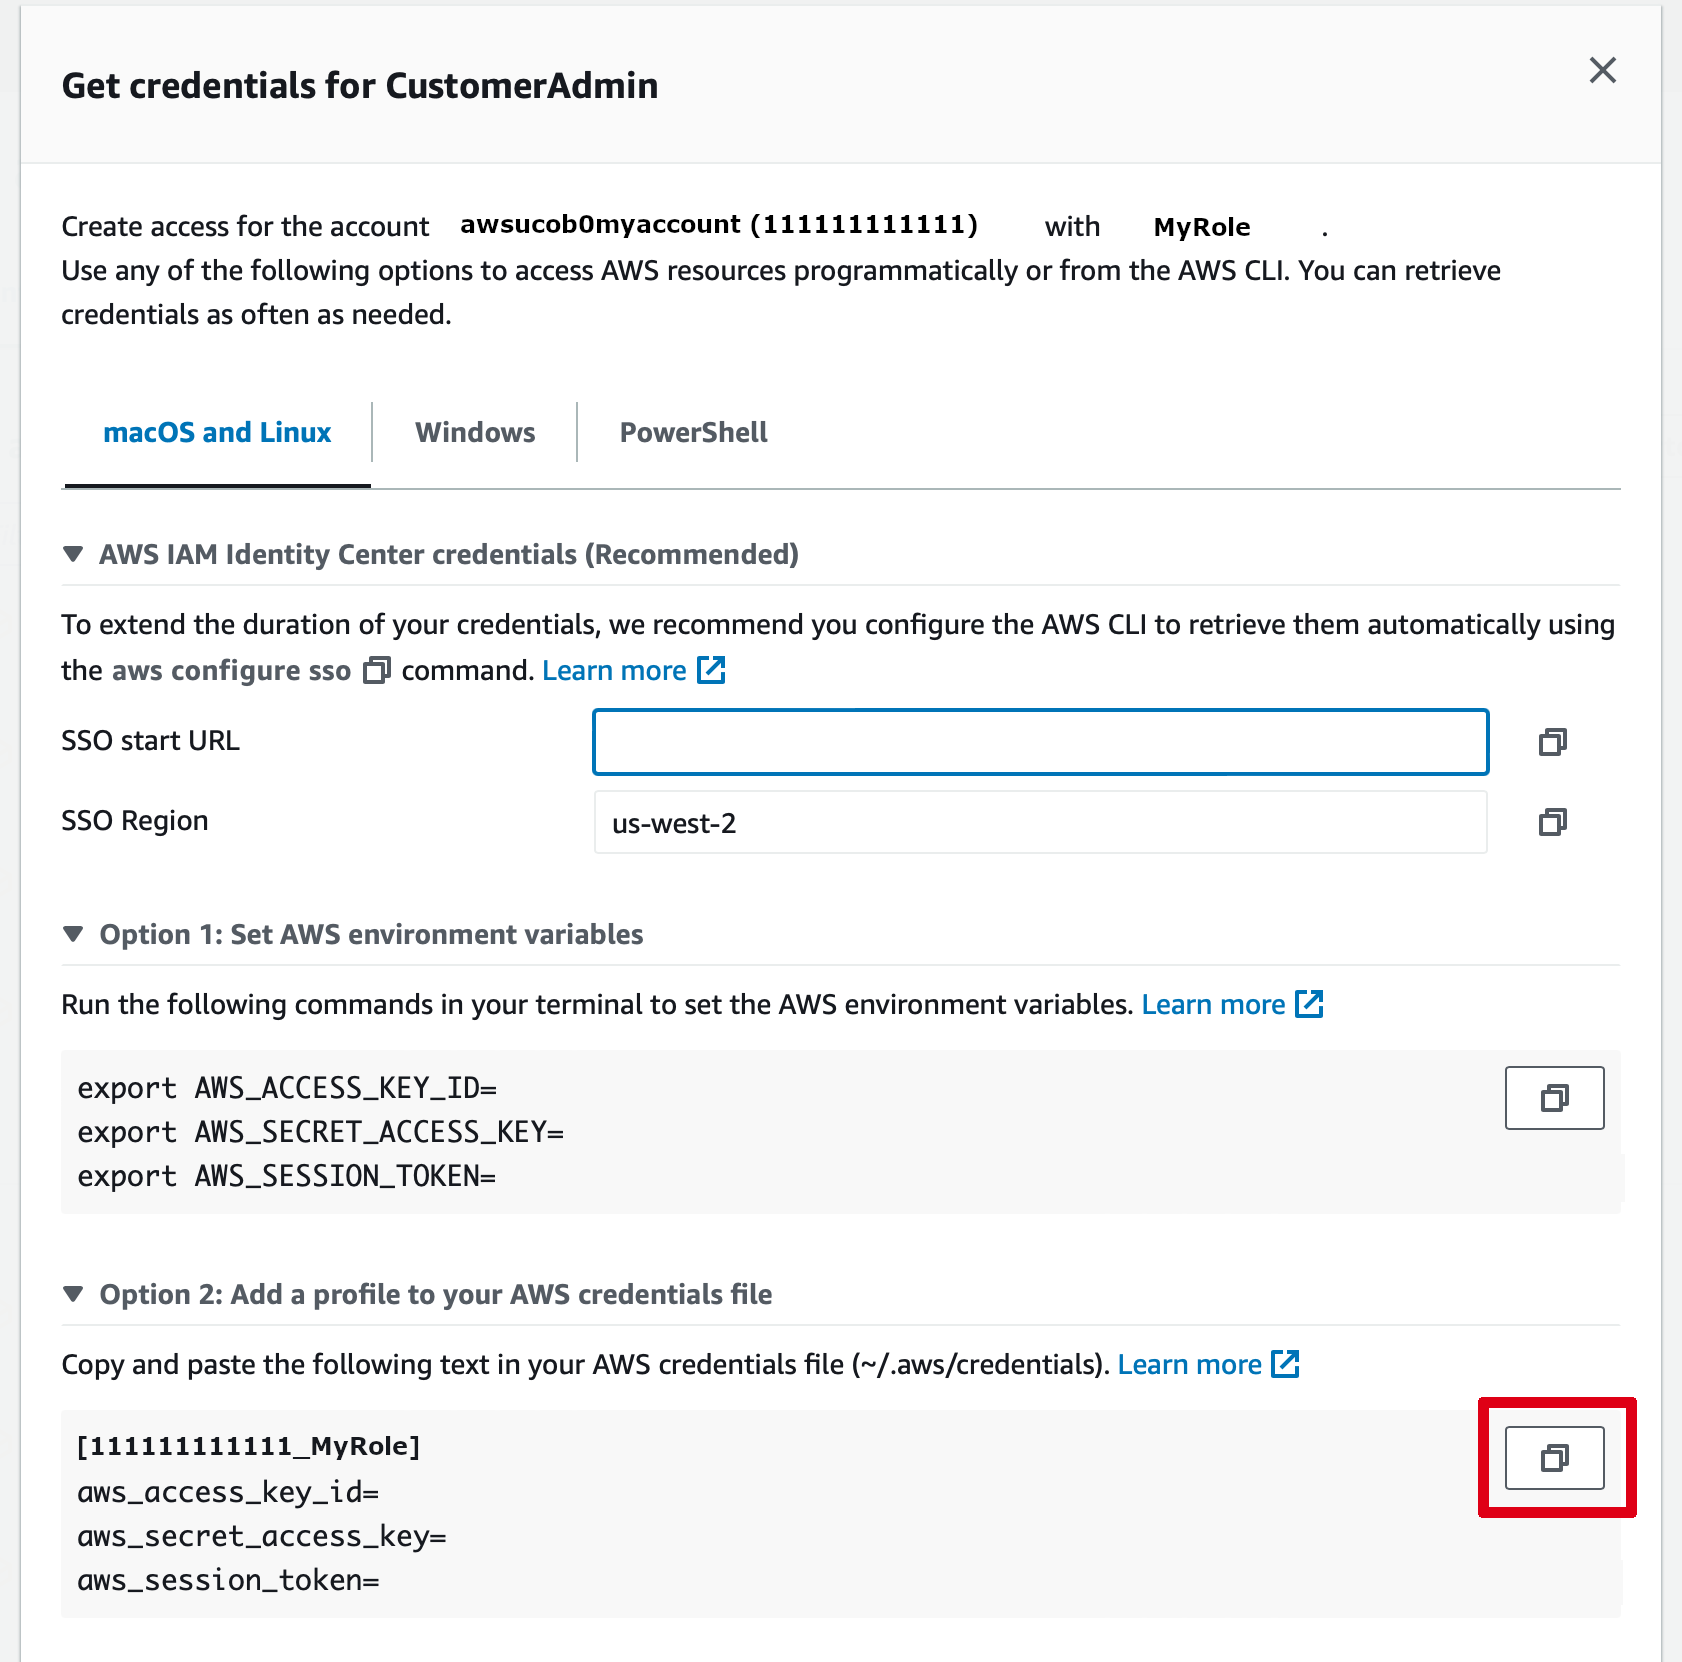
You will be presented with multiple options for acquiring access keys for the CLI. Click on the tab that matches your operating system (OS).
Expand the section named “Option 2: Add a profile to your AWS credentials file” and click on the overlapping squares icon to copy the configuration block that contain your credentials.
Append the credential block you copied in the previous step to your AWS credentials file. This file is located at
~/.aws/credentials(for macOS and Linux) or%USERPROFILE%\.aws\credentials(for Windows). It’s okay if other configuration is already present in this file.$ cat ~/.aws/credentials [111111111111_MyRole] aws_access_key_id=AAAAAAAAAAAAAAAAAAAA aws_secret_access_key=AAAAAAAAAAAAAAAAAAAAAAAAAAAAAAAAAAAAAAAA aws_session_token=AAAAAAAAAAAAAAAAAAAAAAAAAAAAAAAAAAAAAAAAAAAAAAAAAAAAAAAAAAAAAAAAAAAAAAAAAAAAAAAAAAAAAAAAAAAAAAAAAAAAAAAAAAAAAAAAAAAAAAAAAAAAAAAAAAAAAAAAAAAAAAAAAAAAAAAAAAAAAAAAAAAAAAAAAAAAAAAAAAAAAAAAAAAAAAAAAAAAAAAAAAAAAAAAAAAAAAAAAAAAAAAAAAAAAAAAAAAAAAAAAAAAAAAAAAAAAAAAAAAAAAAAAAAAAAAAAAAAAAAAAAAAAAAAAAAAAAAAAAAAAAAAAAAAAAAAAAAAAAAAAAAAAAAAAAAAAAAAAAAAAAAAAAAAAAAAAAAAAAAAAAAAAAAAAAAAAAAAAAAAAAAAAAAAAAAAAAAAAAAAAAAAAAAAAAAAAAAAAAAAAAAAAAAAAAAAAAAAAAAAAAAAAAAAAAAAAAAAAAAAAAAAAAAAAAAAAAAAAAAAAAAAAAAAAAAAAAAAAAAAAAAAAAAAAAAAAAAAAAAAAAAAAAAAAAAAAAAAAAAAAAAAAAAAAAAAAAAAAAAAAAAAAAAAAAAAAAAAAAAAAAAAAAAAAAAAAAAAAAAAAAAAAAAAAAAAAAAAAAAAAAAAAAAAAAAAAAAAAAAAAAAAAAAAAAAAAAAAAAAAAAAAAAAAAAAAAAAAAAAAAAAAAAAAAAAAAAAAAAAAAAAAAAAAAAAAAAAAAAAAAAAAAAAAAAAAAAAAAAAAAAAAAAAAAAAAAAAAAAAAAAAAAAAAAAAAAAAAAAAAAAAAAAAAAAAAAAAAAAAAAAAAAAAAAAAAAAAAAAAAAAAAAAAAAAAAAAAAAAAAAAAAAAAAAAAAAAAAAAAAAAAAAAAAAAAAAAAAAAAAAAAAAAAAAAAAAAAAAAAAAAAAAAAAAAAA
While these credentials can be used from any shell window, you’ll need to specify the profile name to select them. You can do this by setting the environment variable
AWS_PROFILEto the profile name or passing it on the command line. Confirm your access by querying your AWS identity.For macOS and Linux:
$ export AWS_PROFILE=111111111111_MyRole
$ aws --no-cli-pager sts get-caller-identity
{
    "UserId": "AAAAAAAAAAAAAAAAAAAAA:ralphie@colorado.edu",
    "Account": "111111111111",
    "Arn": "arn:aws:sts::111111111111:assumed-role/AWSReservedSSO_MyRole_aaaaaaaaaaaaaaaa/ralphie@colorado.edu"
}
OR for Windows PowerShell:
$ $Env:AWS_PROFILE="111111111111_MyRole"
$ aws --no-cli-pager sts get-caller-identity
{
    "UserId": "AAAAAAAAAAAAAAAAAAAAA:ralphie@colorado.edu",
    "Account": "111111111111",
    "Arn": "arn:aws:sts::111111111111:assumed-role/AWSReservedSSO_MyRole_aaaaaaaaaaaaaaaa/ralphie@colorado.edu"
}
OR for macOS, Linux, and Windows:
$ aws --no-cli-pager --profile 111111111111_MyRole sts get-caller-identity
{
    "UserId": "AAAAAAAAAAAAAAAAAAAAA:ralphie@colorado.edu",
    "Account": "111111111111",
    "Arn": "arn:aws:sts::111111111111:assumed-role/AWSReservedSSO_MyRole_aaaaaaaaaaaaaaaa/ralphie@colorado.edu"
}
You are now authenticated for the AWS CLI. To log out, delete the lines you added from
~/.aws/credentials.
Option 3: CLI SSO Integration#
This option is recommended when you want to use multiple shell sessions to access multiple AWS accounts or want to refresh credentials after the timeout period from the command line. For more information, please see the official AWS SSO CLI documentation.
Configure CLI SSO settings. Append the following to your AWS CLI configuration file. This file is located at
~/.aws/config(for macOS and Linux) or%USERPROFILE%\.aws\config(for Windows). You only have to do this once.[sso-session entra] sso_start_url = https://cuboulder.awsapps.com/start sso_region = us-west-2 sso_registration_scopes = sso:account:access
Create a profile for each AWS account you want to configure in your
~/.aws/configfile. You can find appropriate account numbers and role names at the AWS access portal that you use when logging in via a web browser. Append an entry for each account as shown below. You only have to do this once.[profile awsucob0myaccount] sso_session = entra sso_account_id = 111111111111 sso_role_name = MyRole region = us-west-2 output = json [profile awsucob0myotheraccount] sso_session = entra sso_account_id = 222222222222 sso_role_name = MyOtherRole region = us-west-2 output = json
Log into SSO.
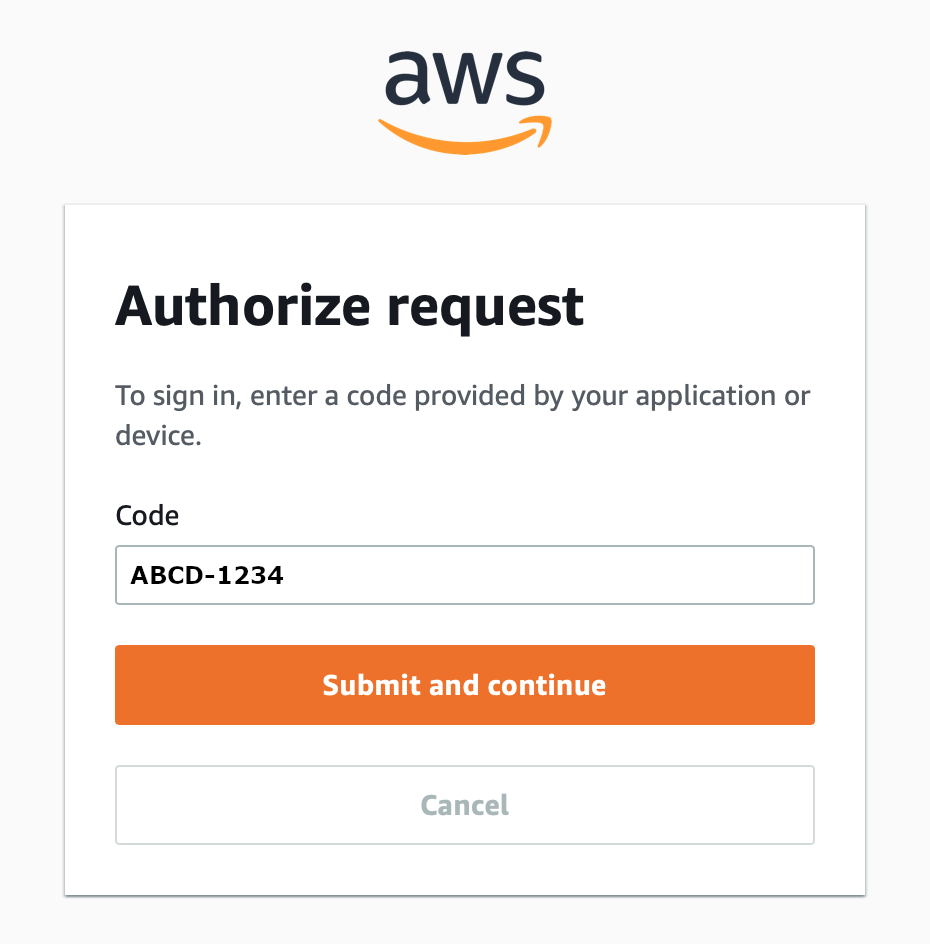
$ aws sso login --sso-session entra
Attempting to automatically open the SSO authorization page in your default browser.
If the browser does not open or you wish to use a different device to authorize this request, open the following URL:

https://device.sso.us-west-2.amazonaws.com/

Then enter the code:

ABCD-1234
You will be prompted to log in via your default browser. Follow the same flow as used when accessing the AWS console. After authentication, you will be prompted to allow CLI access to your session. Enter the code (“ABCD-1234” in this example) and press “Submit and continue”.
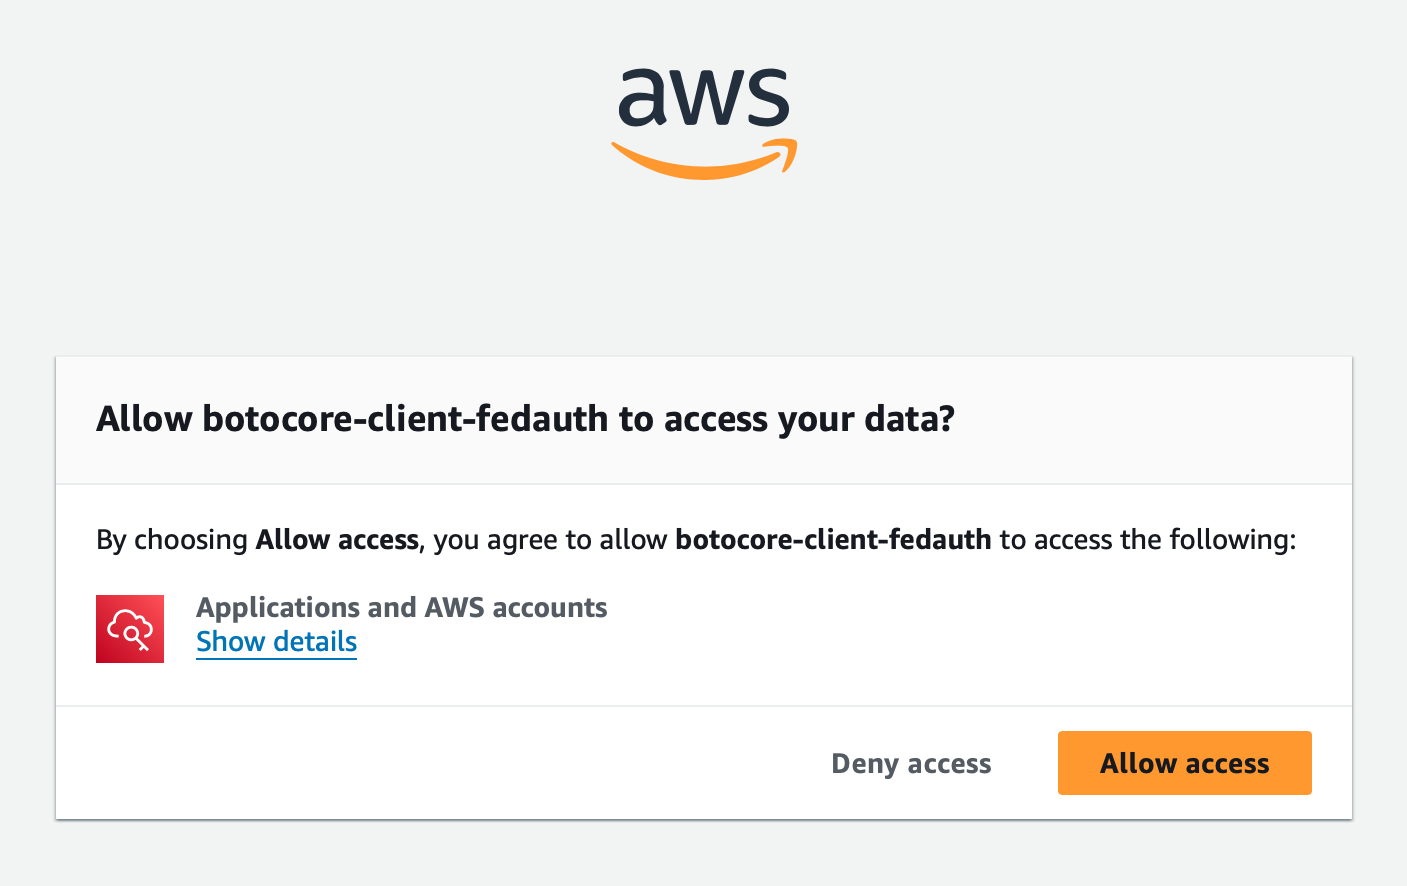
On the following page that says “Allow botocore-client-entra to access your data?”, click “Allow access”.
You will be taken to a success page.
You can now close this page in your browser and return to the terminal. The terminal should say:
Successfully logged into Start URL: https://cuboulder.awsapps.com/start
Confirm your access by querying your AWS identity. Per-account credentials will be automatically refreshed when needed until the 8-hour SSO session expires.
For macOS and Linux:
$ export AWS_PROFILE=awsucob0myaccount
$ aws --no-cli-pager sts get-caller-identity
{
    "UserId": "AAAAAAAAAAAAAAAAAAAAA:ralphie@colorado.edu",
    "Account": "111111111111",
    "Arn": "arn:aws:sts::111111111111:assumed-role/AWSReservedSSO_MyRole_aaaaaaaaaaaaaaaa/ralphie@colorado.edu"
}
OR for Windows PowerShell:
$ $Env:AWS_PROFILE="awsucob0myaccount"
$ aws --no-cli-pager sts get-caller-identity
{
    "UserId": "AAAAAAAAAAAAAAAAAAAAA:ralphie@colorado.edu",
    "Account": "111111111111",
    "Arn": "arn:aws:sts::111111111111:assumed-role/AWSReservedSSO_MyRole_aaaaaaaaaaaaaaaa/ralphie@colorado.edu"
}
OR for macOS, Linux, and Windows:
$ aws --no-cli-pager --profile awsucob0myaccount sts get-caller-identity
{
    "UserId": "AAAAAAAAAAAAAAAAAAAAA:ralphie@colorado.edu",
    "Account": "111111111111",
    "Arn": "arn:aws:sts::111111111111:assumed-role/AWSReservedSSO_MyRole_aaaaaaaaaaaaaaaa/ralphie@colorado.edu"
}
(Optional) To switch accounts, just use another profile name. You do not have to re-authenticate.
$ aws --no-cli-pager --profile awsucob0myotheraccount sts get-caller-identity
{
    "UserId": "AAAAAAAAAAAAAAAAAAAAA:ralphie@colorado.edu",
    "Account": "222222222222",
    "Arn": "arn:aws:sts::222222222222:assumed-role/AWSReservedSSO_MyRole_aaaaaaaaaaaaaaaa/ralphie@colorado.edu"
}
When done, log out from SSO and all accounts with:
aws sso logout