Configuring Azure budget action
Cost control is a critical component to maximizing the value of your investment in the cloud. To configure a Budget and Budget actions in Azure, you’ll complete the following actions by using the steps provided in each section. This document specifically outlines an example of how to setup a budget action to shutdown virtual machine when it meets the configured alert condition.
These actions included in this tutorial allow you to:
1. Create an Azure Automation Account, Import relevant Runbook, which will use webhooks to stop VMs.
2. If needed, Add role assignment to provide relevant access to the Automation account to perform operations on virtual machines.
3. If haven't already,Create the budget with the wanted thresholds and wire it to the action group.
4. Azure Monitor Action Group will be configured to trigger the Webhook when the budget threshold is met. This behaviour can be tested using 'Test action group'.
Creating Azure Automation Account
- Sign in to the Azure Management Console and search for Automation accounts on the top search bar. Click Create and choose the subscription that you intent to manage, A Resource Group to place the Automation account, Name and Region to host Automation account.

- Leave all other parameters to default. You may optionally choose to configure Tags as per your compliance standards. Click Review+Create and then click on Create.


- Once you are in your Automation Account, Click on Runbooks and click on Browse Gallery from the top pane.

- Search for Stop Azure V2 VMs from the search bar. Make sure to choose source as Github. Click on Stop Azure V2 VMs graphical runbook.

- Review the graphical flow to understand how this runbook will excute to stop all VMs at subscription or resource group level and then click on Select at the bottom.

- Name the Runbook and click Import. In Edit graphical runbook pane, Click on Publish and choose Yes


Add VM Contributor Role Assignment
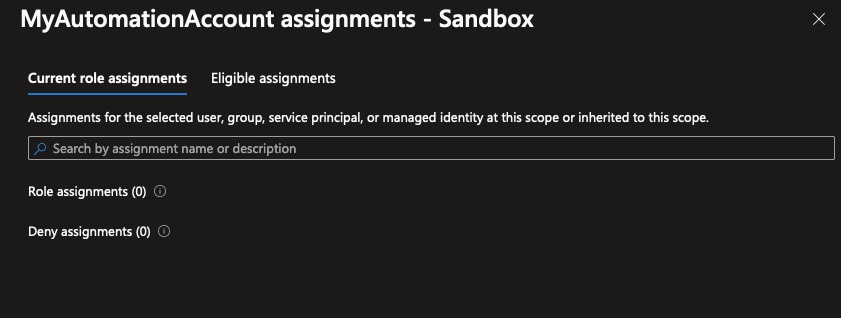
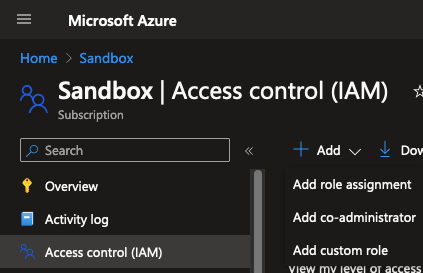
- To check access level of the Automation account that you created, go to Subscription using top search bar and click on your subscription name. Then click on Access control (IAM) >> choose check access from top pane >> click on check access

- Choose Managed Identity and choose your subscription. Under ‘Managed Indentity’ choose Automation Accounts and select your automation account. This will show you manually or auto assigned Role assignments for this automation account (if any).


- In case you don’t see any Role assignments, Click on Add in Access Control (IAM) blade of your subscription and choose Add role assignment.
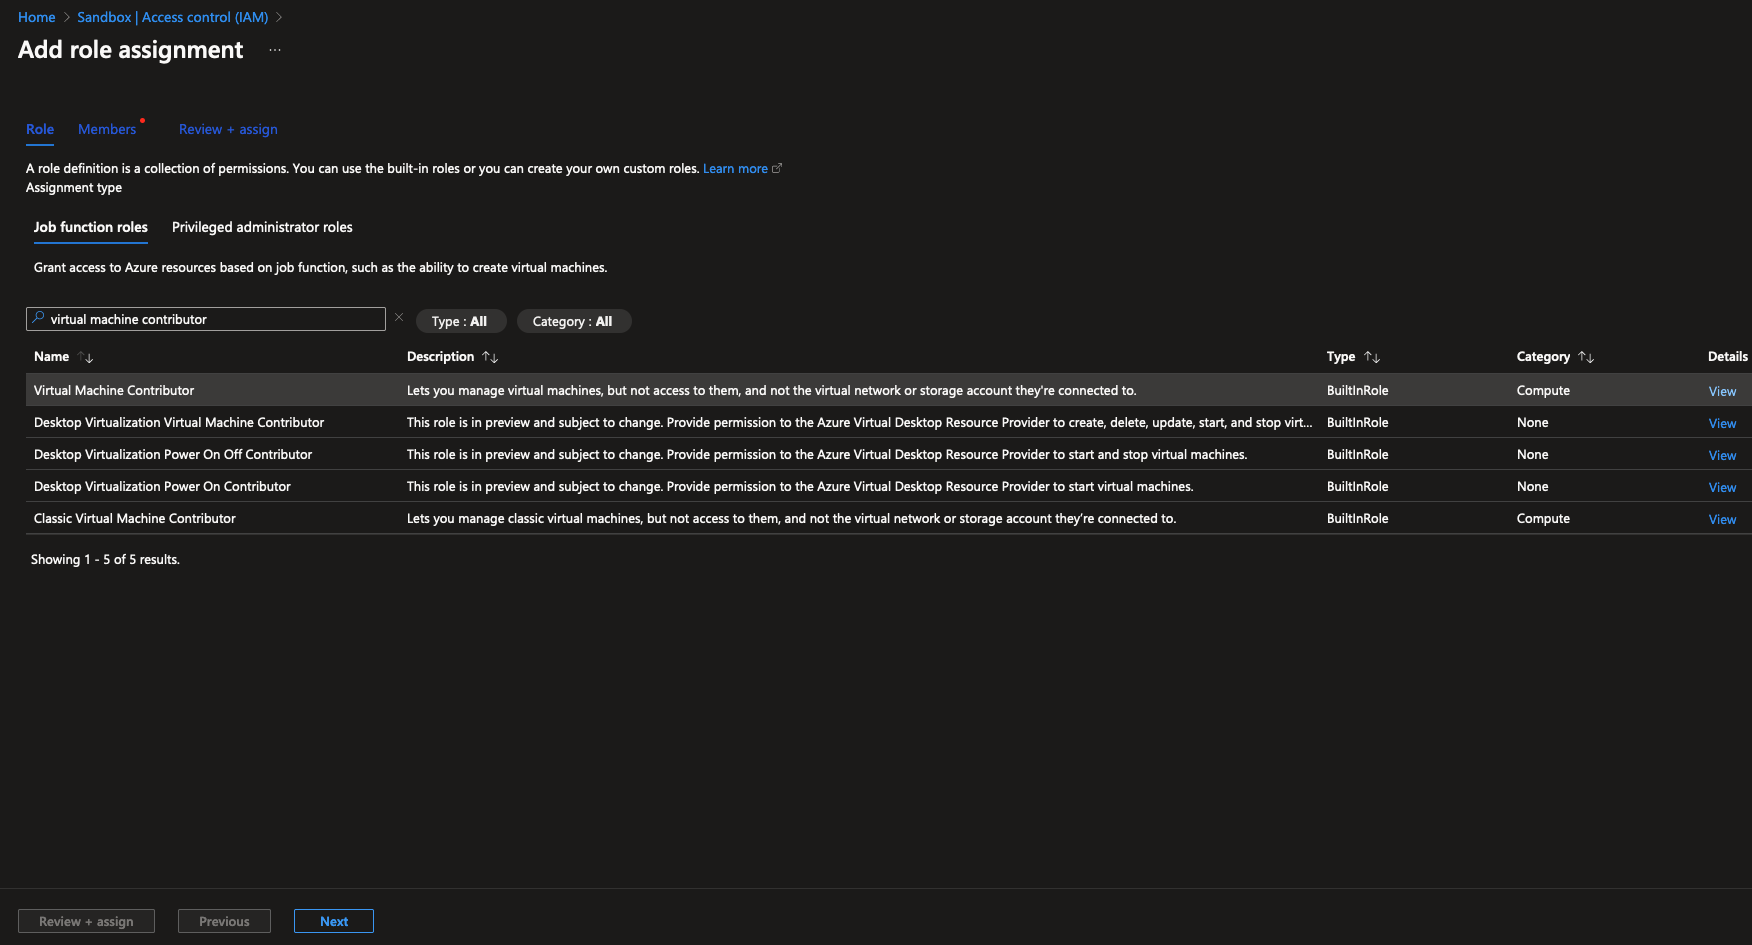
In Role >> Job function roles >> search for virtual machine contributor and click on it. Then click Next to assign this role to our automation account.


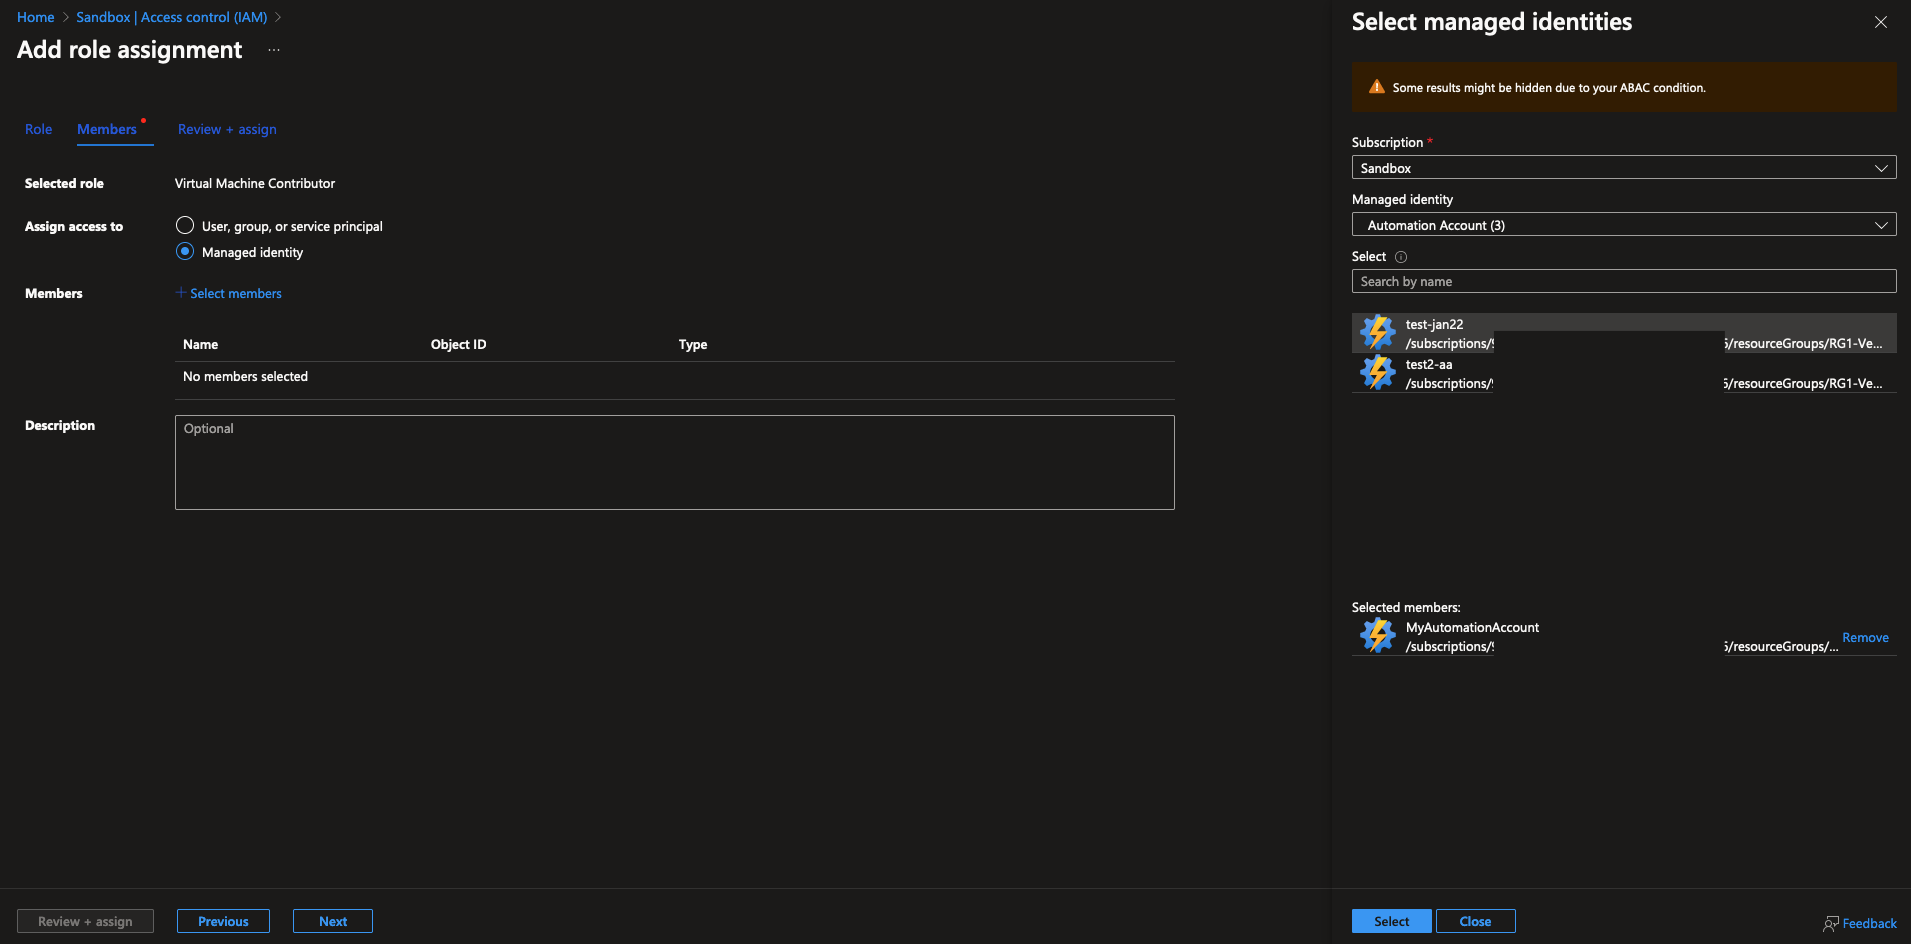
- Choose Managed Identity radio button, click on select members to select your automation account. Once your clicked on select, click on Review+Assign.

Create Budget and Action Group
- To create budgets, choose Budgets in your subscription

- Name, choose reset period (I chose monthly). You may consider to leave creation and expiration dates as is and finally enter Total Budget amount and click next.

- In Set alerts tab, click on Manage action group. Click Create to create a new action group.


- Enter necessary details in Basics tab as per below screenshot and click Next:Notifications. Choose Email/SMS/Push/Voice and choose the option convenient for you (I choose email in this example) and click OK. Finally Name the Notification and click on Next:Actions.


- Under Actions choose Automation Runbook as Action type. Choose relevant options as per screenshot below and finally click on Configure Parameters. You may choose to Resourcegroupname if you want to enforce budget actions at RG level. Subscription is the only mandatory parameter, hence in this example I am enforcing budget actions at Subscription level. Click OK multiple times and finally name the Action. Click on Review+create and then Create


- Once you are back on Action Groups page, give it 10-20 seconds for the new Action group to show up. Click on Refresh if needed. Once you see your Action group, carefully click on Red X at the top right corner, only Once, to come back to Create Budget pane.

- When action group is created you’ll receive an email notification like below

- On Create Budget pane, configure alert conditions as needed, I chose to not perform any action for 80% and enforce budget action when my budget hits 100% utilization, in this example. Make sure to select the action group which you have created in previous step. Click Create in the bottom, once you have filled all relevant fields as per below screenshot. In the next section, we will test this action group if it really works.

Test Azure Monitor Action Group
Don’t test this if you have any production VMs running which you do not intend to stop. Create a new Resource Group with a couple of test VMs to test this. Make sure your webhook in Automation Runbook is set to take action at Resoruce Group level.
- The Action Group that we created be found under Monitor >> Alerts >> Action Groups on the top pane. Use the top search bar to find Azure Monitor service.

- In the Actions Groups Pane select the checkbox right next to the action group you’ve created and click on Test action group from the top.

- Leave the default selection of notification and action test. Choose Cost Budget alert from the drop down for sample type. This will send a test email to ensure email notification is working and will test if the webhook fires up to stop VMs from the Subscription/Resource group (based on your webhook configuration)

- Once the test completes, you will either see a success or a failure error status on the screen. You may navigate to VM service to view if you notice your virtual machines are in disallocated state.

- You would receive an email like this if your email notification test succeeds.
